
From your first seed potatoes to a harvest worth sharing, a little practical advice makes all the difference. Start with the guide you need below.
Grow potatoes
Our complete guide, from opening your delivery to lifting and storing your crop.
Start growing →Choose your potatoes
Find a variety to suit your cooking, growing space and harvest plans.
Find your variety →Onions, garlic & shallots
Planting and care advice for your autumn-planted sets and bulbs.
Read the guide →How to grow potatoes
Whether you have an allotment, a vegetable bed or a few patio containers, there is room to grow your own potatoes. Follow the stages below, keeping your local weather and chosen variety in mind.
1. On arrival: storing and chitting
Keep your seed potatoes somewhere cool, frost-free and ventilated. Avoid warm rooms and sealed plastic bags. Label different varieties so you can identify them at planting time.
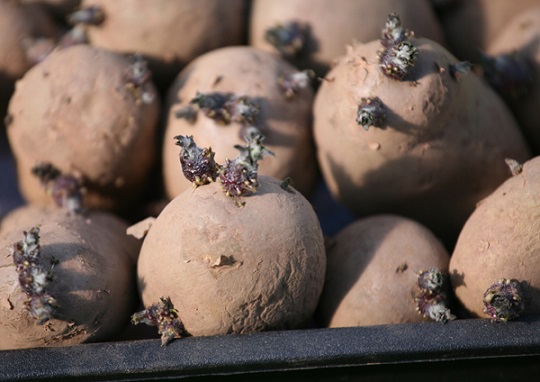
Chitting means encouraging shoots before planting. Stand tubers in an egg carton or shallow tray, with the end carrying most eyes facing upwards. Place them in a cool, bright position away from frost. Aim for compact, sturdy shoots; long, pale growth suggests too much warmth or too little light.
Chitting is especially useful for an earlier start with early varieties. Maincrop potatoes can also be planted without chitting. If planting is still months away, keep unsprouted seed cool and check it regularly; there is no need to encourage growth immediately.
2. Choose and prepare your planting spot
A sunny position with loose, fertile soil makes planting and harvesting easier. Improve heavy or light soils with well-rotted organic matter, and avoid planting into waterlogged ground. Rotate your potato patch, aiming for a four-year gap before returning potatoes to the same bed.
3. When should you plant?
March and April are the usual spring planting months, but conditions matter more than a date. Wait if soil is cold, saturated or frozen. Northern and exposed gardens often need a later start.
| Potato type | Typical planting | Typical harvest |
|---|---|---|
| First early | March–April | June–July |
| Second early | March–April | July–August |
| Maincrop | April | Late August–October |
These are broad UK and Ireland guidelines. Variety, planting date and growing conditions affect harvest timing.
4. Planting in the ground
Make a trench or individual planting holes approximately 10–15cm deep. Place seed potatoes with shoots pointing upwards, then gently cover with soil without breaking the shoots.
- Earlies: space tubers about 30cm apart, with 60cm between rows.
- Maincrop: allow 30–35cm between tubers and 75cm between rows.
Keep rows labelled. Leave enough room between them to draw soil around the plants as they grow.
5. Growing in pots and bags
Choose a large container with open drainage holes and use suitable peat-free multipurpose compost. A layer of stones cannot replace drainage holes.
- Add approximately 10–15cm of compost to the base.
- Space your seed potatoes across the surface, shoots upwards. Avoid crowding: two or three tubers are a sensible starting point for a 40-litre container, depending on its shape and the variety.
- Cover with approximately 10cm of compost and water gently.
- Add compost in stages as shoots grow, keeping some foliage exposed.
- Finish a few centimetres below the rim to leave space for watering.
Early varieties are a useful choice for containers. Check moisture frequently: pots can dry out even after light rain.
6. Earthing up and frost protection
As plants grow, draw loose soil around their stems to build a ridge. Repeat as needed to keep developing tubers covered and protected from light. In containers, use additional compost.
Watch the forecast after shoots emerge. Protect tender foliage with fleece during cold spells, removing it when conditions improve. Do not assume planted potatoes are safe from frost once leaves appear.
7. Watering and feeding
Check the soil rather than relying on rainfall alone. During dry spells, water thoroughly at the base so moisture reaches the roots. Consistent moisture is particularly valuable while tubers are developing; avoid repeated drying out followed by heavy soaking.
Containers need closer attention than beds. Water until excess can drain away, but never leave pots standing in water.
If using a potato fertiliser, follow its label rate. More feed is not automatically better: excessive nitrogen encourages leafy growth and can delay maturity. Container compost contains a limited supply of nutrients, so check its feeding guidance too.
8. Knowing when to harvest
For early potatoes, gently investigate beside one plant to check tuber size. Lift what you need and allow the remainder to grow on. Flowers can be a useful clue, but some varieties flower little or not at all.
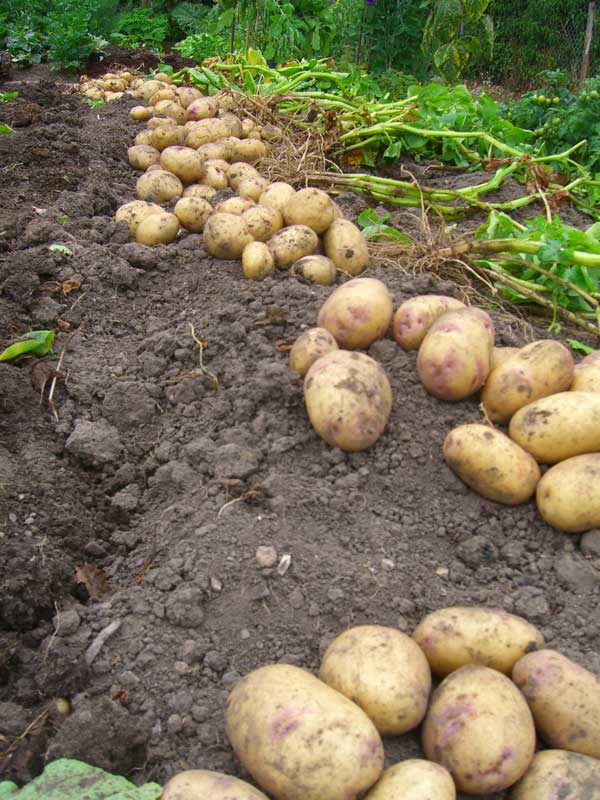
For maincrops intended for storage, let the crop mature and the foliage yellow naturally. After removing the tops, allow roughly 10–14 days for skins to firm before lifting, provided the crop is healthy and conditions are suitable.
Place your fork well away from the stems and lift carefully to reduce damage. Containers can be emptied onto a sheet and the potatoes collected by hand.
9. Storing your harvest
Eat early potatoes fresh for their best flavour and texture. Store sound maincrop tubers dry, unwashed and in darkness, using breathable paper or hessian sacks. Choose a cool, frost-free place and inspect regularly, removing any that soften or rot.
Use damaged potatoes promptly if otherwise sound. Discard green or rotten tubers.
A few problems to watch for
- Exposed tubers: cover them promptly to prevent greening.
- Slug damage: check a sample crop rather than leaving mature potatoes in the ground indefinitely.
- Sudden browning or collapse: do not assume this is normal maturity. Seek advice if disease is suspected.
Ready for your next crop?
Choose potatoes you will enjoy cooking, then match the variety to your space and preferred harvest time.
Need a hand? Tell us your variety, planting date and growing conditions at hello@patchseedpotatoes.co.uk.
Further reading: RHS potato-growing advice and Garden Organic’s potato guide.